Forums
The great place to discuss topics with other users
📲 PWA Tracker Addon Installation Guide + Bonus
'
Hello! here is another little addon by ScriptsTribe, I been having this for more than 6 month So I have it the old touch all you files way....In addition I updated the Sngine default manifest to include missing images... andat the end as a bonus a little trick if you want to add notification icon to top bar of you phone.... again, this is a if you want to and you will need to edit fuctions.php for this... :)
Open the file first and analize, upload the manifest.php only if you want to update the default PWA to what it used to look like when you used my PWA with the pop up images, I will talk aboutthis at the end of the tracker tutorial.
So lets go to the tutorial.....
Upload the files that you downloaded from the store...
Open content/themes/Your theme/templates/_footer.tpl
And at the end, before the </body> tag add
<!-- PWA Tracker ScriptsTribe-->
<script>
// Add user ID to window (server-side injected)
window.pwaUserId = {$user->_data.user_id|default:0};
// Send install event once user installs the PWA
window.addEventListener('appinstalled', function () {
fetch('/modules/pwatracker/ajax/pwatracker.php', {
method: 'POST',
headers: { 'Content-Type': 'application/json' },
body: JSON.stringify({
action: 'install',
user_id: window.pwaUserId,
timestamp: Date.now()
})
});
});
// Send ping on page load
fetch('/modules/pwatracker/ajax/pwatracker.php', {
method: 'POST',
headers: { 'Content-Type': 'application/json' },
body: JSON.stringify({
action: 'ping',
user_id: window.pwaUserId,
timestamp: Date.now()
})
});
</script>
<!-- PWA Tracker ScriptsTribe End-->
open root/admin.php (This will assign the access to admin page)
look for
case 'pwa': // check admin|moderator permission if ($user->_is_moderator) { _error(__('System Message'), __("You don't have the right permission to access this")); }
// page header page_header($control_panel['title'] . " › " . __("PWA")); break;
and after that add
case 'pwatracker': require_once('modules/pwatracker/pwatracker.php'); break;
Now open content/themes/default/templates/admin.tpl
Look for
<!-- Dashboard --> <li {if $view == "dashboard"}class="active" {/if}> <a href="{$system['system_url']}/{$control_panel['url']}"> <i class="fa fa-tachometer-alt fa-lg fa-fw mr10" style="color: #5e72e4"></i>{__("Dashboard")} </a> </li> <!-- Dashboard -->
and after that add
<!-- PWA TRACKER SCRIPTSTRIBE --> <li {if $view == "plugins"}class="active" {/if}> <a href="{$system['system_url']}/{$control_panel['url']}/pwatracker"> 📲 {__("PWA Tracker")} </a> </li> <!-- PWA TRACKER SCRIPTSTRIBE -->
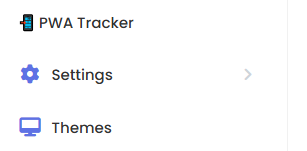
Now you will see the menu like this
Visit that link and if you uploaded the files correct you will see a (Install Table) Button next to the red Run Unistall Check Button... CLick on in to install the database... (I can't screenshot the button because my table is already installed and I don't want to unistall :D)
Now the Bonus part
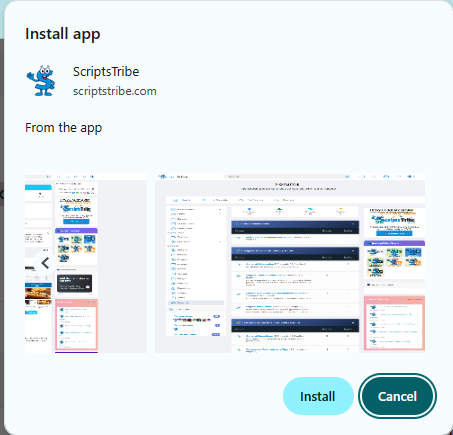
If you decided to upload the manifest.tpl that is located inside my zip content/themes/default/templates/manifest.tpl yu will be able to add images that will show up like this.
And also the shortcuts
Upload the folder included in th content/uploads/pwa and open the manifest.tpl, go to the section
"screenshots": [
This shows on Desktop installation banner popup and their size is 2400x1600
- bighome.png
- bigforum.png
This Shows on Mobile Popup installation banner and their sizes is 1080x1920
- home.png
- short.png
- forum.png
Now go to section I
"shortcuts": [
Change the descriptions and add your own icons and links
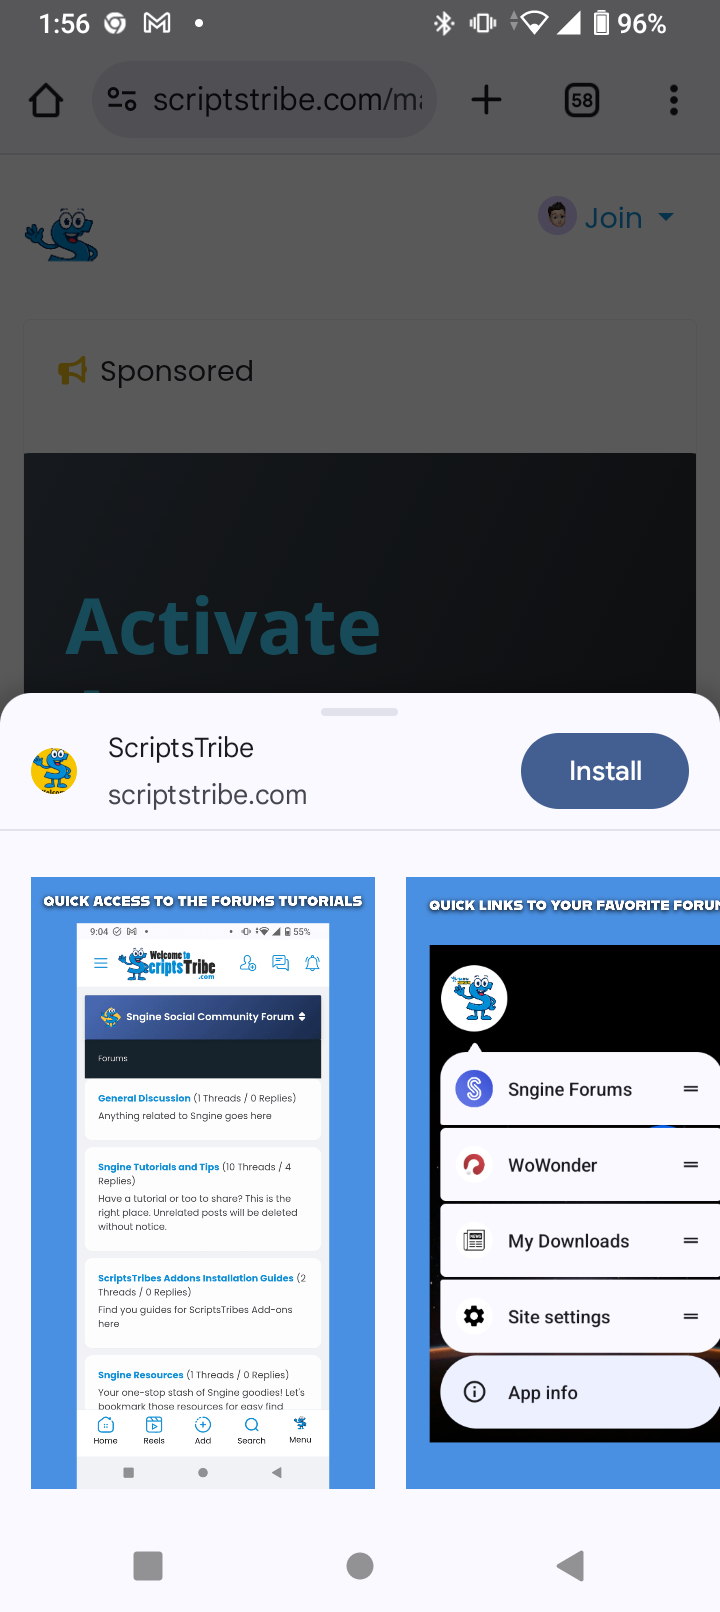
mine is showing like this

Extra Bonus....
Do you want your icon to show on mobile notification bar like this?


Well! for this you will need to edit includes/functions.php
look for
$request_body = [ 'app_id' => $onesignal_app_id, 'include_player_ids' => [$send_to], 'url' => $notification['url'], 'contents' => [ 'en' => $notification['full_message'] ], 'headings' => [ 'en' => ($notification['headings']) ? $notification['headings'] : $system['system_title'] ],
and after that add
'chrome_web_icon' => $system['system_url'] . '/content/uploads/pwa/icon-192x192.png', 'chrome_web_badge' => $system['system_url'] . '/content/uploads/pwa/badge.png',
Badge Icon Requirements (for chrome_web_badge):
'chrome_web_badge' => $system['system_url'] . '/content/uploads/pwa/badge.png',
-
Size:
72x72 pixels is ideal. Chrome might scale it down, but that’s the sweet spot. -
Format:
Must be a.pngwith transparent background. -
Color rules:
-
Monochrome (single color) recommended.
-
Best practice: use white shapes on transparent background — because it gets auto-tinted by Chrome based on the system theme.
-
Do not use detailed or colorful logos.
-
-
No shadows, no gradients, no fancy stuff.
That is all :) I hope you enjoyed this huge reading :D