



Resize Embroidery Designs Without Losing Quality
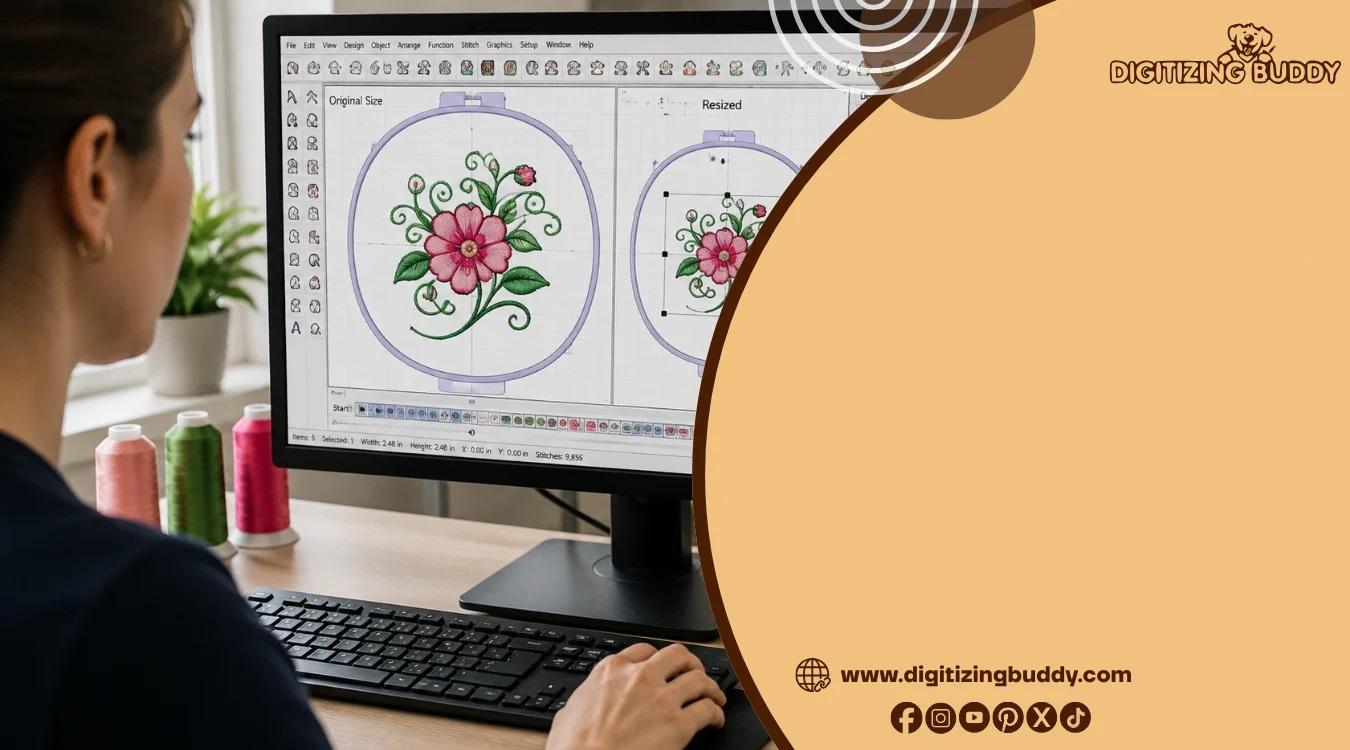
Imagine spending time creating the perfect embroidery design, only to resize it and discover that the letters look messy, the stitches bunch together, or the whole design loses its shape. It is a common problem, especially when a design needs to fit a different hoop or garment.
The good news is that you can resize embroidery designs without losing quality when you use the right approach. However, embroidery designs are not ordinary images. Simply making a design larger or smaller does not always produce good stitching.
A quality embroidery resize requires attention to stitch density, stitch direction, underlay, pull compensation, lettering, and the fabric being used. In this guide, you will learn how to resize designs correctly and avoid the most common problems.
Can You Resize Embroidery Designs Without Losing Quality?
Yes, but there is an important difference between scaling an embroidery file and properly resizing a digitized design.
An embroidery file contains stitches rather than simple pixels. When you change its dimensions, the stitches may become too dense, too loose, or incorrectly spaced.
For small size changes, automatic resizing may work reasonably well. For larger changes, the design often needs to be adjusted or re-digitized.
Think of it like resizing a recipe. If you double the size of a cake, you cannot always expect the same result by changing only one ingredient. The proportions of everything need to work together.
Why Embroidery Designs Lose Quality When Resized
When an embroidery design is resized, several stitch-related problems can appear.
Stitch Density Changes
Stitch density refers to how closely stitches are placed together.
If you make a design smaller without adjusting its stitches, the stitches can become packed too tightly. This may create:
- Heavy thread buildup
- Fabric puckering
- Needle breaks
- Thread breaks
- Poor-looking details
Making a design larger can cause the opposite problem. Stitches may become too spread out, leaving gaps or weak coverage.
Small Details Can Disappear
Tiny elements do not always survive resizing.
A small shape that looks clear at its original size may become difficult for the machine to reproduce when reduced. Thin outlines and tiny lettering are especially sensitive.
Underlay May Become Incorrect
Underlay stitches provide a foundation beneath the visible stitches.
When a design is resized significantly, the original underlay may no longer be suitable for the new dimensions. This can affect stability, coverage, and overall appearance.
Pull Compensation May Need Adjustment
Different fabrics and stitch directions can cause embroidery to pull or push during stitching.
After resizing, the existing compensation may no longer provide the same result. This can lead to gaps, distorted edges, or uneven shapes.
The Safest Way to Resize an Embroidery Design
The safest approach depends on how much you need to change the design.
For a small adjustment, such as making a design slightly smaller to fit a garment, scaling may be enough.
For a major size change, it is usually better to edit the original digitized design or have it re-digitized for the new size.
A good workflow looks like this:
- Open the original embroidery design.
- Save a backup copy.
- Check the original dimensions and stitch count.
- Set the required new size.
- Review stitch density.
- Check underlay and stitch directions.
- Inspect small lettering and details.
- Check the design against the hoop size.
- Preview the stitch sequence.
- Test-stitch the resized version.
This process gives you much better control than simply dragging the design larger or smaller.
How to Resize Embroidery Designs Without Losing Quality
1. Start With the Original Design
Always work from the highest-quality source available.
If you have an editable digitizing file, use that instead of repeatedly resizing an already converted machine file.
Keeping the original file also makes it easier to make future changes.
2. Make Small Size Changes When Possible
Small adjustments are generally safer than extreme resizing.
For example, changing a design by a modest percentage may not create major stitching problems. But shrinking a large design to a tiny chest logo can completely change how its stitches need to be structured.
If you need a major size difference, consider re-digitizing the design for the target dimensions.
3. Maintain Proper Stitch Density
Stitch density is one of the most important factors in embroidery quality.
When reducing a design, avoid allowing stitches to become overly concentrated. When enlarging it, make sure there is enough coverage to prevent gaps.
The ideal density depends on factors such as:
- Fabric type
- Thread
- Stitch type
- Needle
- Design size
- Underlay
- Embroidery machine
There is no single density value that works perfectly for every project.
4. Pay Special Attention to Lettering
Text can become difficult to stitch when a design is resized.
Small letters may lose their shape, while enlarged letters may require changes to stitch width, spacing, and density.
If your design includes names, initials, or small text, inspect them closely after resizing.
Sometimes the best solution is to adjust the lettering separately rather than scaling it together with the entire design.
5. Check Stitch Direction
Stitch direction affects how embroidered areas look and behave on fabric.
When resizing, examine areas where stitch angles meet. Poor stitch direction can make shapes look uneven or create unwanted gaps.
A properly digitized design should use stitch directions that support the shape and structure of each element.
6. Review Underlay Stitches
Underlay helps anchor the embroidery and prepare the fabric for the top stitches.
After resizing, check whether the underlay still makes sense for the new design dimensions.
If necessary, adjust the underlay rather than relying entirely on automatic scaling.
7. Check Pull Compensation
Embroidery does not always stitch exactly as it appears on your computer screen.
Fabric can move or react to stitching, causing shapes to become slightly narrower or distorted.
Pull compensation helps account for this behavior. A significant resize may require compensation adjustments to maintain clean edges.
What Happens When You Make a Design Too Small?
Shrinking an embroidery design too much can create several issues.
Tiny designs have less room for stitches to form recognizable shapes. Dense areas can become crowded, and small lettering can turn into an unreadable mass of thread.
Common problems include:
- Overlapping stitches
- Heavy thread buildup
- Poor detail
- Needle breaks
- Fabric damage
- Unclear lettering
- Excessive trims
If you need a small logo, it is often better to create a small-size version specifically digitized for that purpose.
What Happens When You Make a Design Too Large?
Increasing the size can also create problems.
When a design becomes larger, existing stitches may spread too far apart. Areas that originally had good coverage may develop visible gaps.
You may notice:
- Poor coverage
- Thin-looking fills
- Weak outlines
- Large gaps
- Uneven shapes
- Reduced detail
A large embroidery design may need additional stitches and adjustments to maintain proper coverage.
How Much Can You Safely Resize an Embroidery Design?
There is no universal percentage that guarantees safe resizing.
A small change may work well with some designs, while another design may require adjustments even after a relatively minor size change.
The design itself matters.
Simple designs with broad shapes are generally easier to resize than highly detailed artwork containing tiny lettering, narrow columns, and complex stitch structures.
As a practical rule, the greater the size change, the more likely the design will need professional editing or re-digitizing.
Resize Embroidery Designs for Different Hoop Sizes
Hoop size is one of the main reasons people need to resize embroidery designs.
For example, you may have a design prepared for a larger hoop but need to fit it into a smaller hoop.
Before resizing, check:
- Maximum hoop dimensions
- Design width
- Design height
- Required placement
- Stitch count
- Fabric type
Never assume that a design will fit just because its visual dimensions appear close to the hoop size. Leave enough room for proper positioning and stitching.
Should You Resize or Re-Digitize?
This is one of the most important questions to ask.
Resizing May Be Enough When:
- The size change is relatively small.
- The design has simple shapes.
- There is little small lettering.
- Stitch density remains appropriate.
- The resized preview still looks clean.
Re-Digitizing Is Better When:
- The design needs major resizing.
- Small lettering becomes unreadable.
- Density becomes excessive or too low.
- Details disappear.
- The design is being adapted to a very different fabric.
- You need a different embroidery application.
Re-digitizing takes more time, but it can produce a much better result because the stitches are built specifically for the new dimensions.
Common Embroidery Resizing Mistakes
Even experienced embroiderers can run into problems when resizing designs.
Using Automatic Scaling Without Checking Stitches
Software can change the dimensions quickly, but it may not understand how the new size affects every stitch.
Always inspect the resized design.
Resizing a Low-Quality Source
Starting with a poorly digitized design makes the resizing process harder.
A clean original design gives you a much better foundation.
Ignoring Fabric
A design that works well on a stable fabric may not behave the same way on stretchy knitwear or lightweight fabric.
Consider the final material before deciding how much to resize.
Forgetting to Test Stitch
A screen preview cannot always predict what will happen on real fabric.
A test stitch is one of the easiest ways to catch problems before producing the final item.
Tips for Maintaining Embroidery Quality After Resizing
Follow these simple tips for better results:
- Keep a backup of the original design.
- Work with the original editable file when possible.
- Avoid extreme size changes.
- Check stitch density after resizing.
- Inspect small lettering carefully.
- Review underlay and pull compensation.
- Make sure the design fits the hoop.
- Use suitable stabilizer for the fabric.
- Preview the complete stitch sequence.
- Test-stitch before production.
These small checks can prevent expensive mistakes, especially when you are preparing multiple garments.
Can Embroidery Software Resize Designs Automatically?
Many embroidery software programs include automatic resizing tools.
These tools can be useful for minor adjustments, but automatic scaling should not be treated as a replacement for professional digitizing.
The software may resize the design mathematically, but embroidery is a physical process. Thread, fabric, needle movement, density, and stabilizer all influence the final result.
For important logos or production work, review the resized design carefully before stitching.
When Should You Use Professional Embroidery Digitizing?
If you need to resize a detailed logo, small lettering, mascot, patch, or complex artwork significantly, professional digitizing can save time and improve the final result.
A professional can adjust stitch types, density, underlay, sequencing, compensation, and details for the new dimensions.
At Digitizing Buddy, designs can be prepared with the final embroidery application, fabric, and size in mind rather than simply stretched or compressed.
Final Thoughts
Learning to resize embroidery designs without losing quality is about more than changing width and height. The stitches need to remain balanced so the design can sew cleanly on real fabric.
For small size changes, careful scaling and inspection may be enough. For major changes, detailed artwork, or small lettering, editing or re-digitizing is usually the better choice.
Always check stitch density, underlay, pull compensation, stitch direction, hoop size, and lettering after resizing. Most importantly, test-stitch your design before moving into full production.
A little preparation can turn a resized design from a stitching headache into a clean, professional embroidery result.
FAQs
1. Can I resize an embroidery design without affecting its quality?
Yes, but the result depends on the amount of resizing and the complexity of the design. Small changes are usually easier, while major size changes may require editing or re-digitizing.
2. What happens if I make an embroidery design too small?
The stitches can become too dense, causing thread buildup, puckering, poor details, and unreadable lettering. Very small designs may need to be digitized specifically for their intended size.
3. Does resizing change embroidery stitch density?
It can. Scaling a design changes the relationship between its dimensions and existing stitches. After resizing, always check density and make adjustments when necessary.
4. Is it better to resize or re-digitize an embroidery design?
For minor size changes, resizing may be sufficient. For significant changes or detailed designs, re-digitizing is usually the safer option because the stitches can be optimized for the new size.
5. How do I resize an embroidery design for a smaller hoop?
First check the hoop's maximum embroidery area. Then resize the design while reviewing its stitch density, lettering, underlay, and details. If the design must be reduced significantly, consider having it re-digitized for the smaller hoop.

 English
 Arabic
 Czech
Czech
 French
 Spanish
 Portuguese
 Deutsch
 Turkish
 Dutch
Dutch
 Italiano
 Russian
 Romaian
 Portuguese (Brazil)